This Cookin' Dad

Cameras, Carry-ons, and Cookin' with Kids

  • Home
  • About Me
    • Why I Blog
    • Disclosure
  • Contact Me
  • Press

Search Results for: bread

Grilled Flatbreads

June 25, 2015 by thiscookindad 19 Comments

My grilling theme this month has been full of all sorts of goodies! I don’t think my kids would forgive me, though, if I didn’t include our grilled flatbreads.

Flatbreads-5My kids are pizza fiends and, in an effort to get them to eat a little better version of pizza, I started grilling them a couple of years ago. I found out quickly, though, that trying to grill a round pizza is darned near impossible, so I started making them a little more oblong. Then I decided that I wanted more topping options, so I started to make them a little smaller. What started as a massive pizza on the grill morphed into several tasty flatbreads that give everyone great mealtime options.

So what’s the difference between a flatbread and a pizza? Not much, really. In fact, pizza is a kind of flatbread! Technically, I think that flatbread is supposed to be unleavened. As most people seem to define the two, though, it really seems to come down to the toppings.

Tomato sauce, pepperoni, and cheese? Definitely a pizza! Steak with blue cheese, grilled onions, and arugula? Now we’re talking flatbreads.

Besides toppings, shape can be another factor. Pizzas are usually round, while flatbreads are more rectangular. The lines blur pretty easily, though. One of my favorites involves grilled tomatoes and onions topped with cheese. It’s about as close to pizza as a flatbread is going to get!

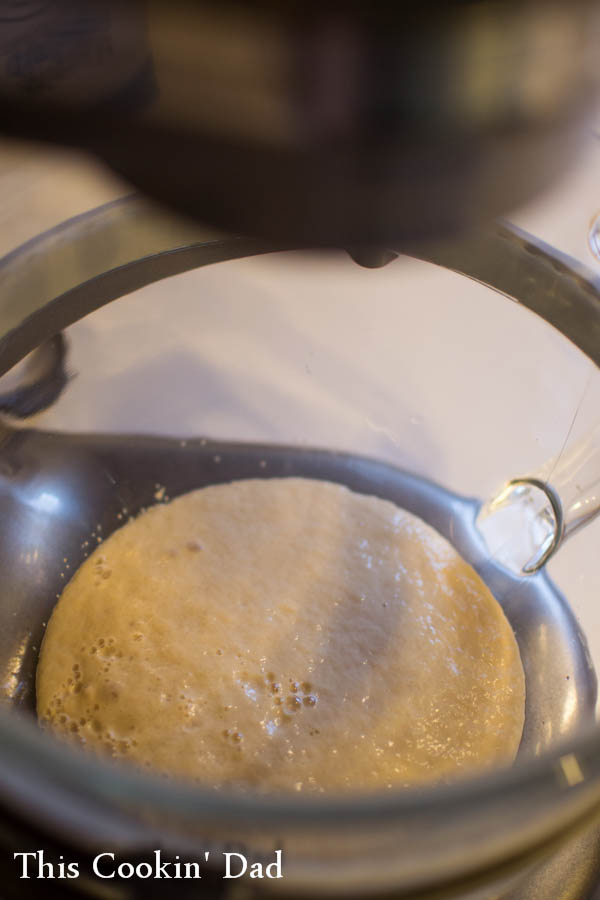
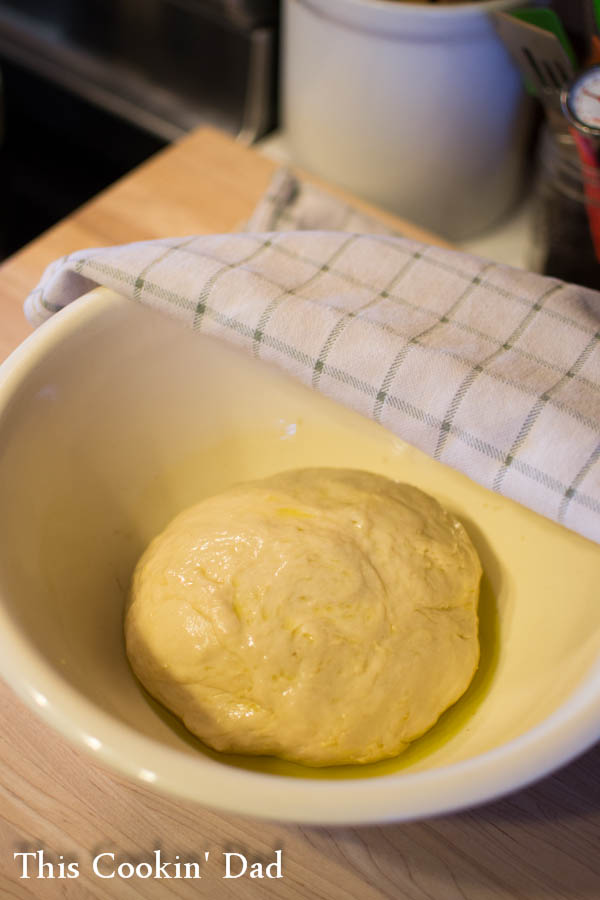
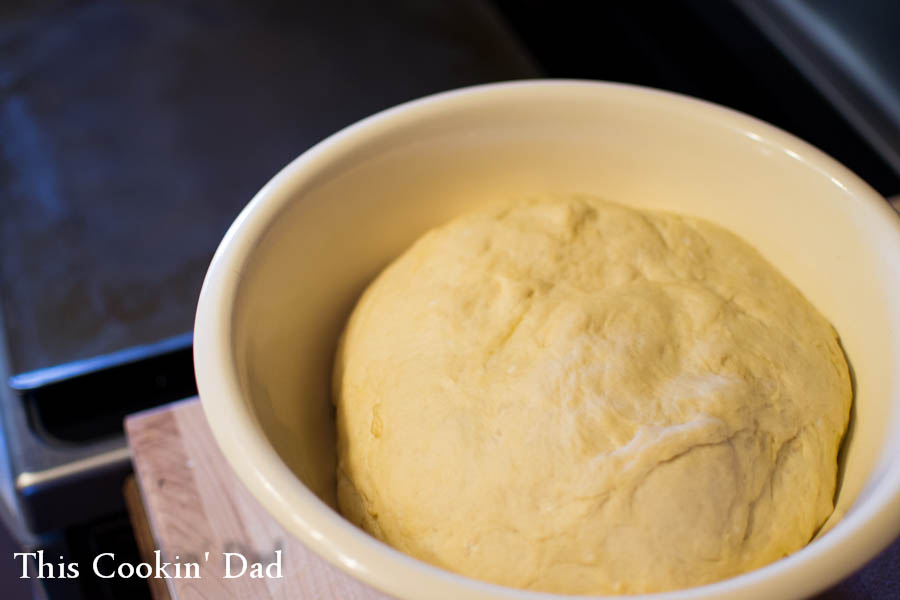
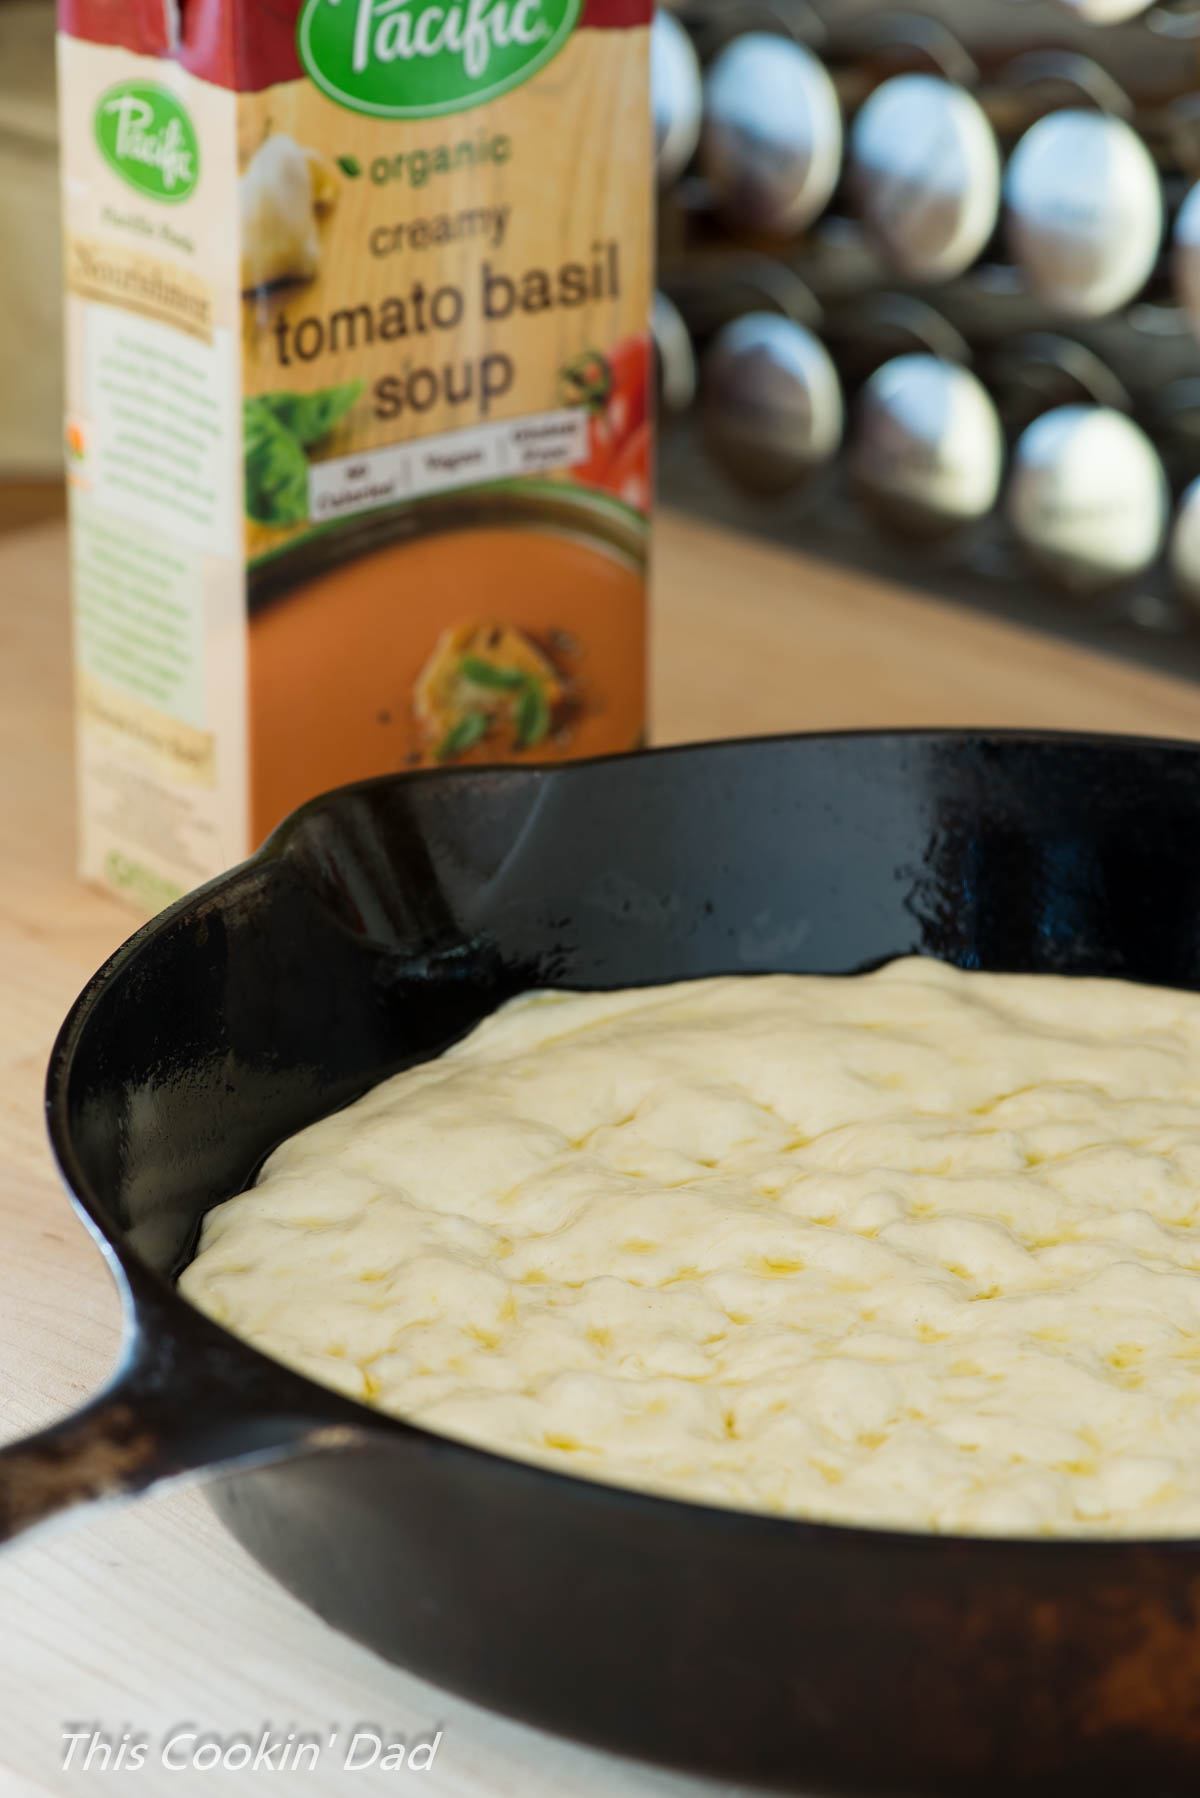
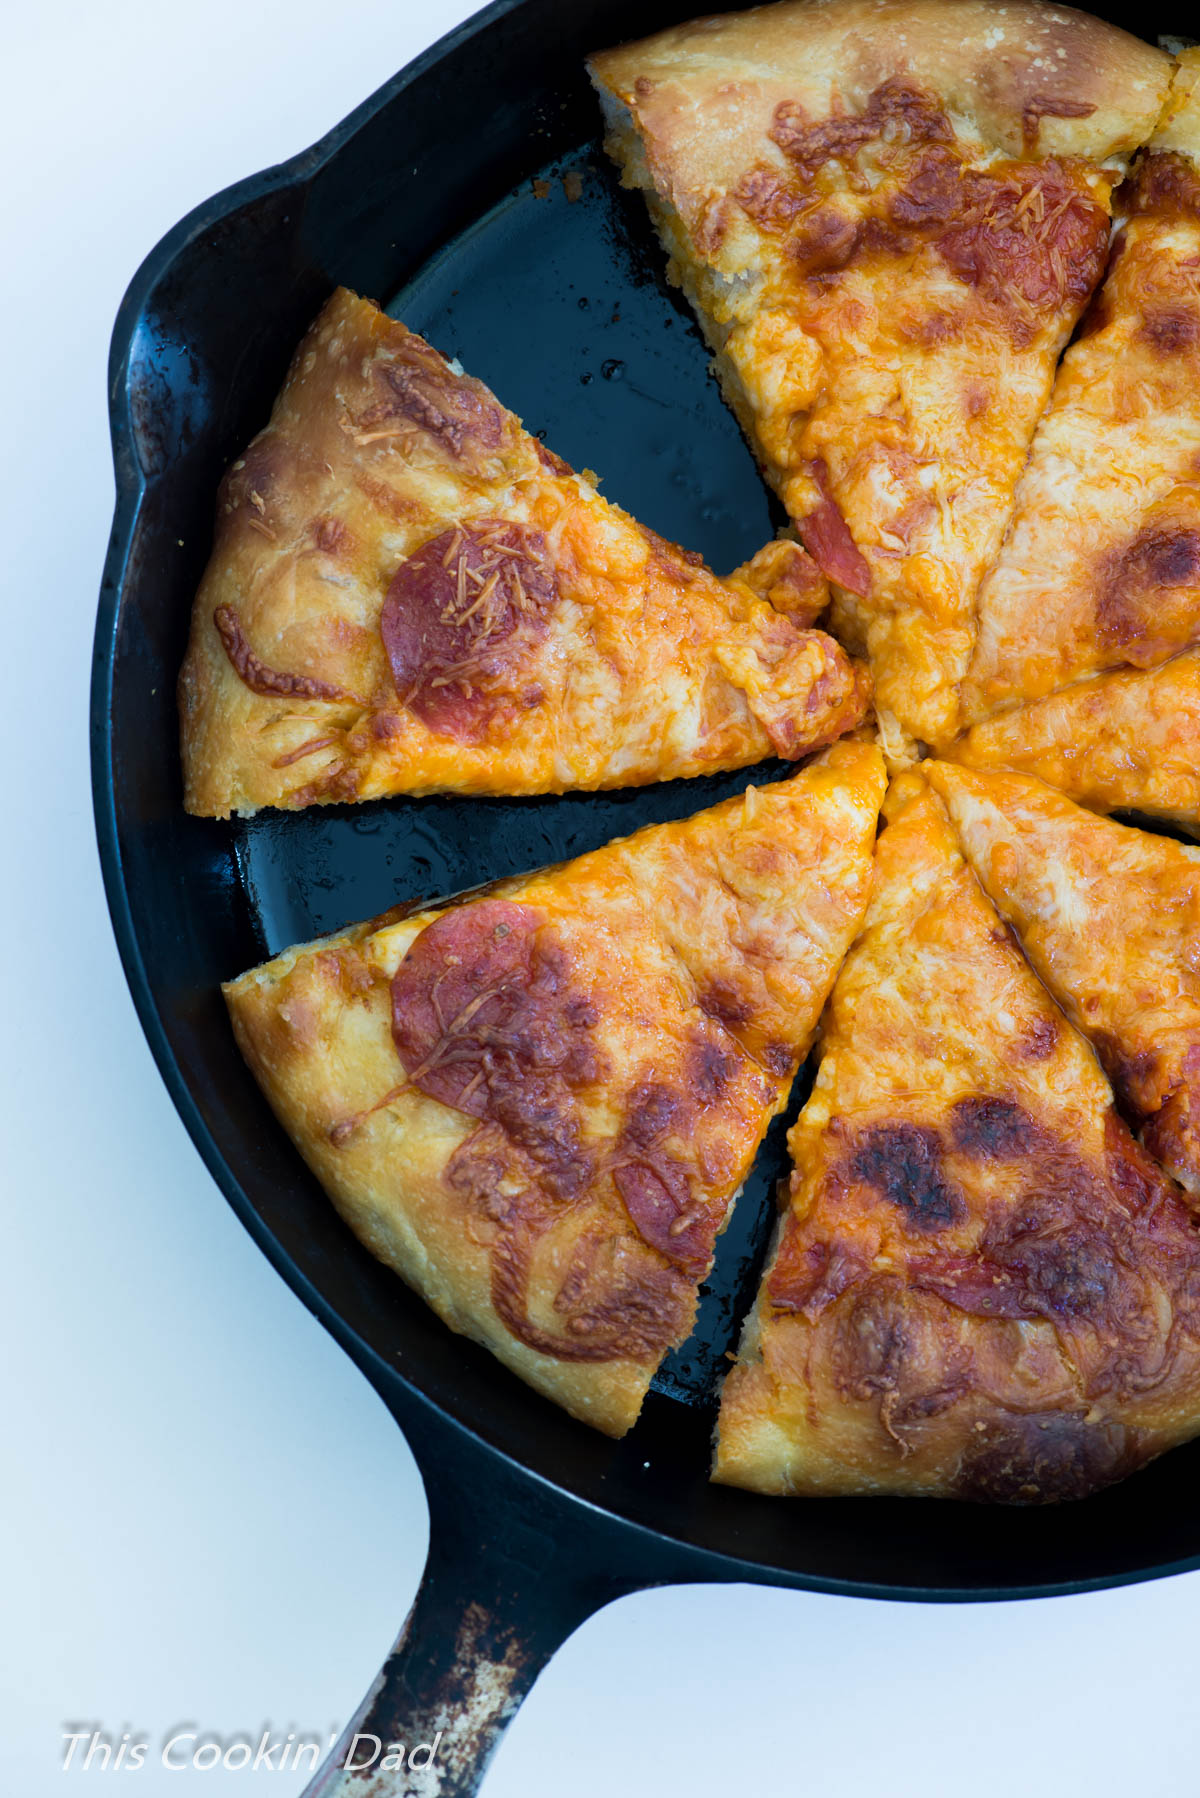
What I know most of all is that, whether pizza or flatbread, grilling has to be the best way to cook it! The smokey char and little burnt bits are just the way that this is supposed to be eaten! I am completely unapologetic in cheating with my pizza dough. I happily buy it at the grocery store, stocking up my freezer when they are on sale.

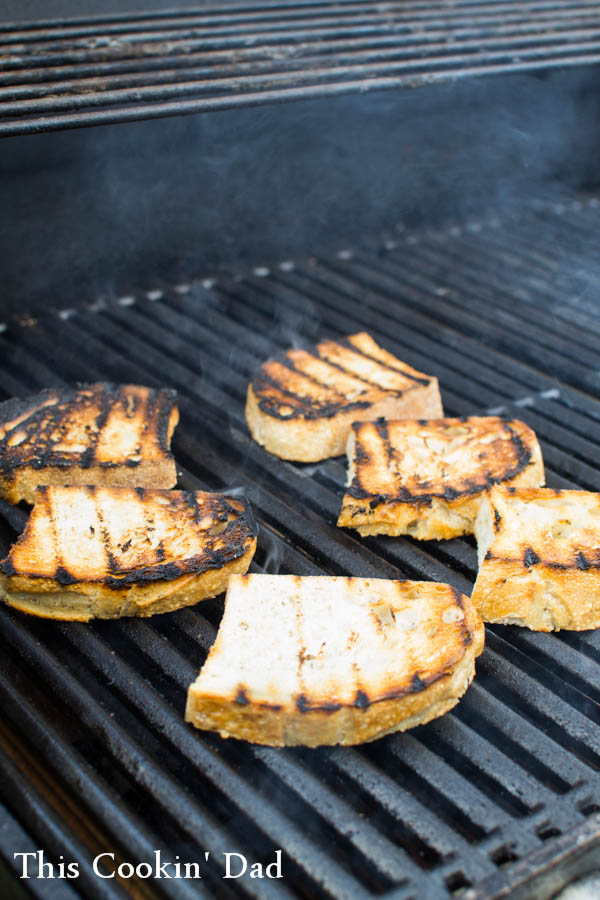
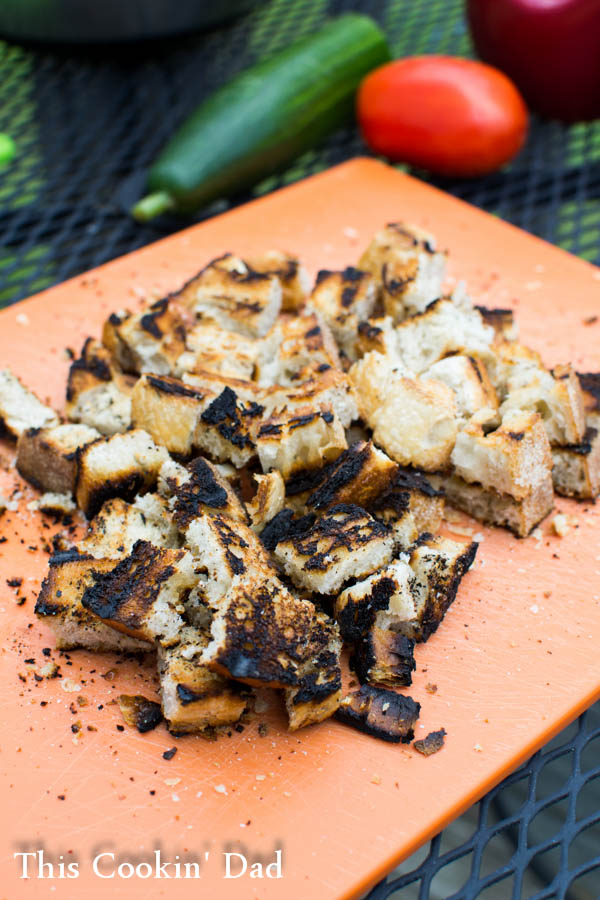
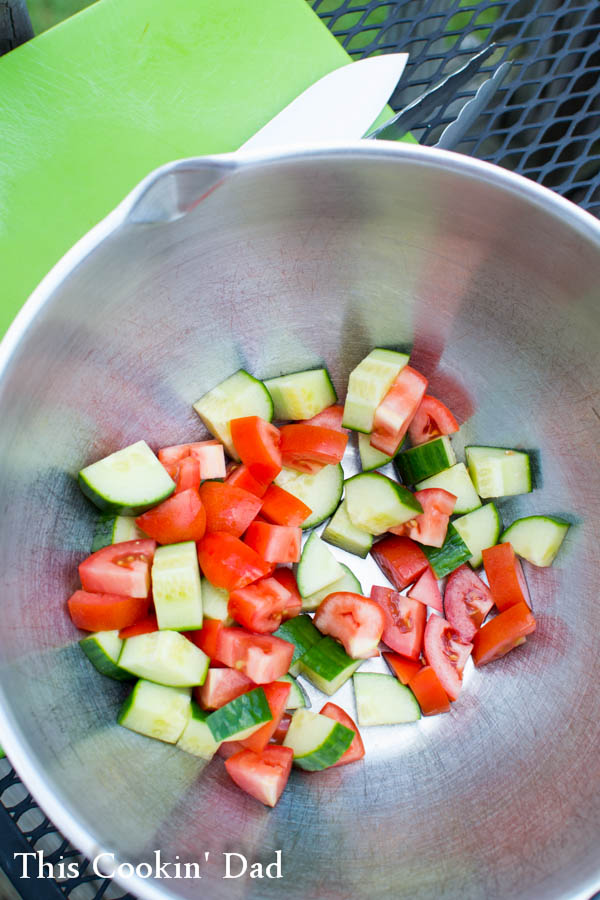
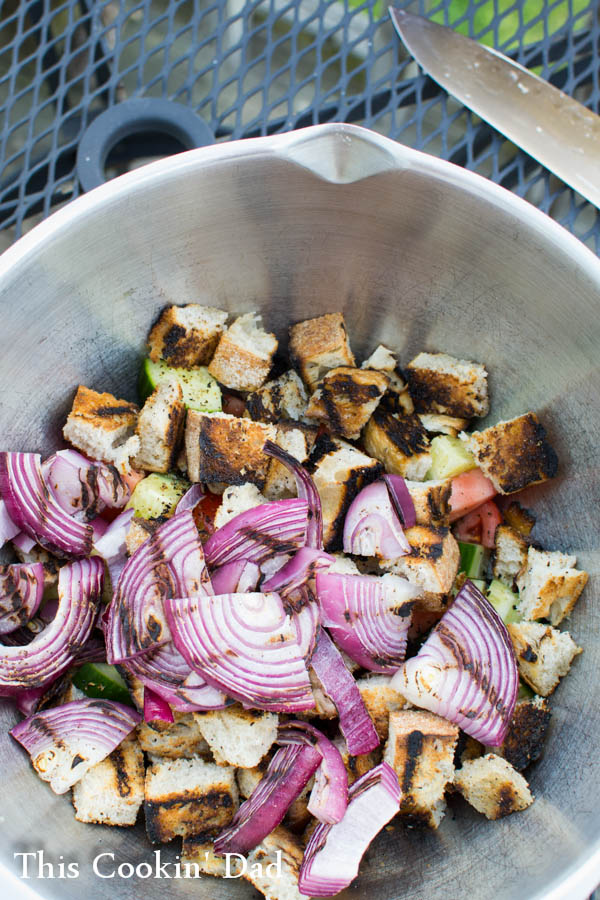
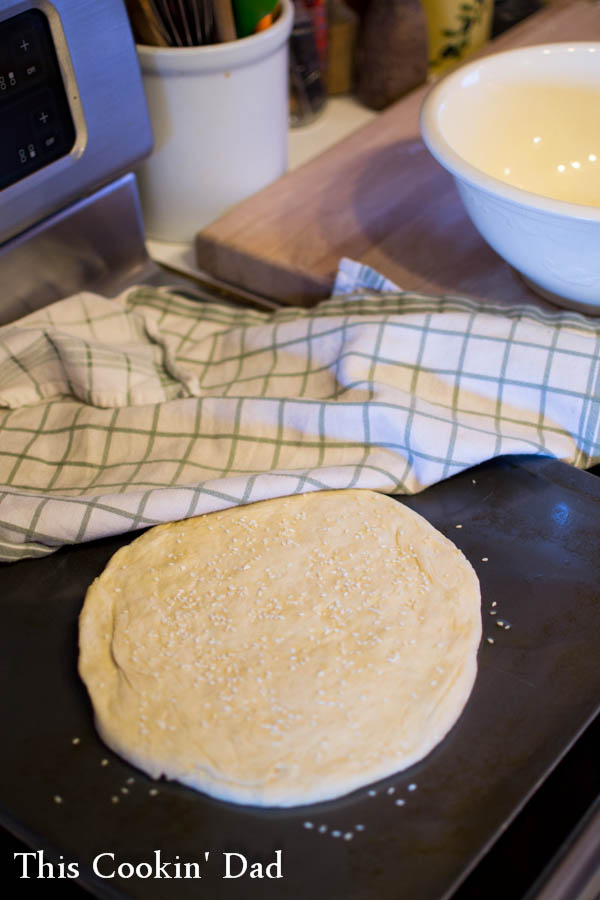
I start out by preparing my other ingredients. The key to good flatbread is to have everything ready to go because that dough cooks really fast on the grill.

Flatbreads-1
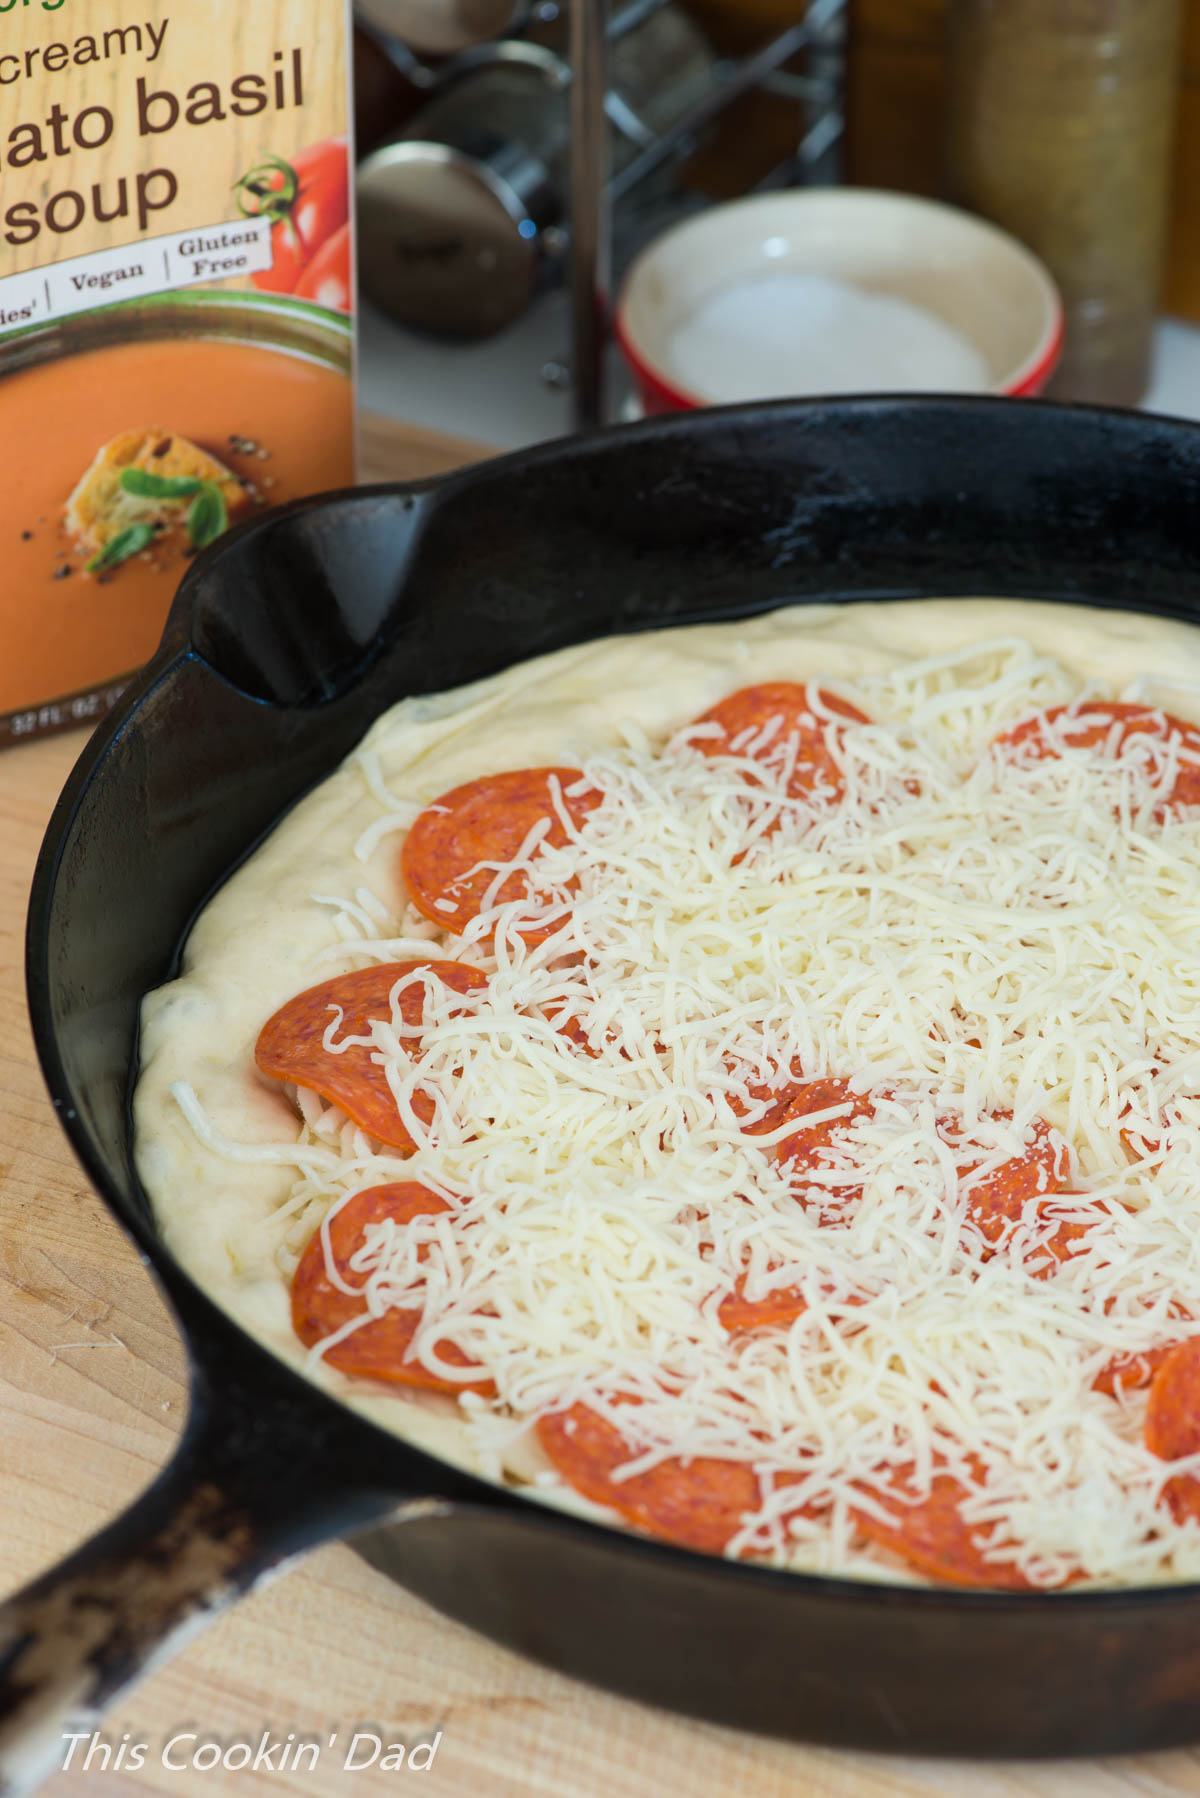
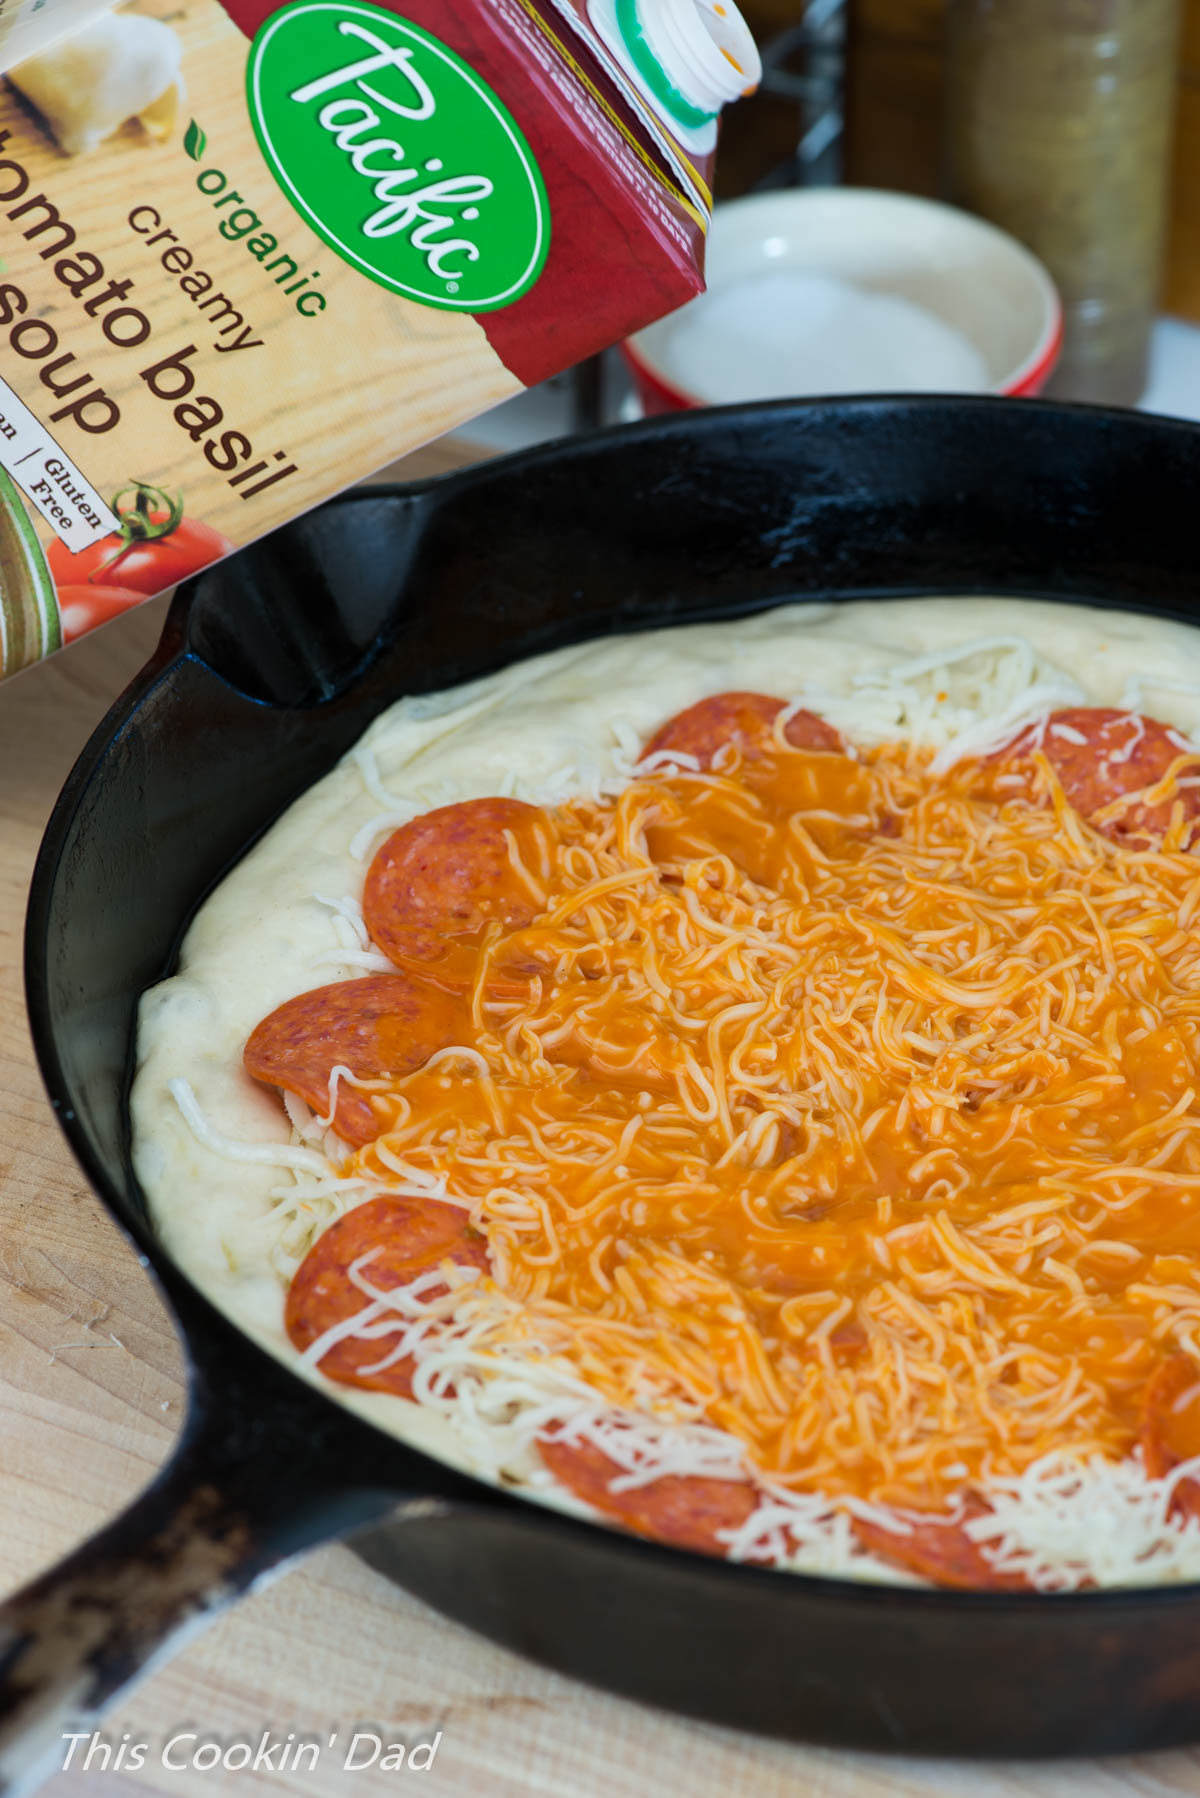
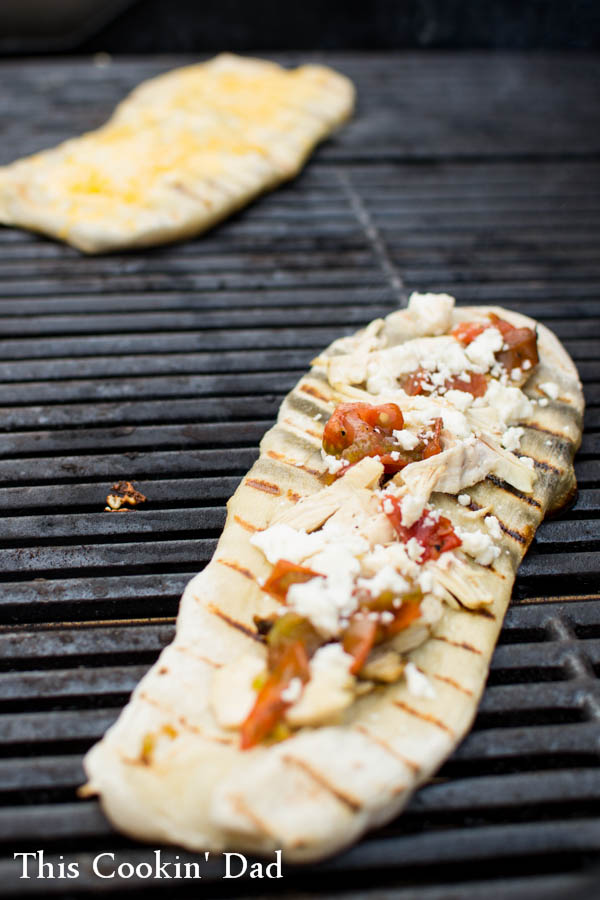
I smear a little oil on the dough before placing it on the grill, adding a little more oil, and letting it get nice and toasty before flipping and adding my toppings. You can top with just about anything! From chicken with grilled tomatoes and queso fresco….

Flatbreads-2
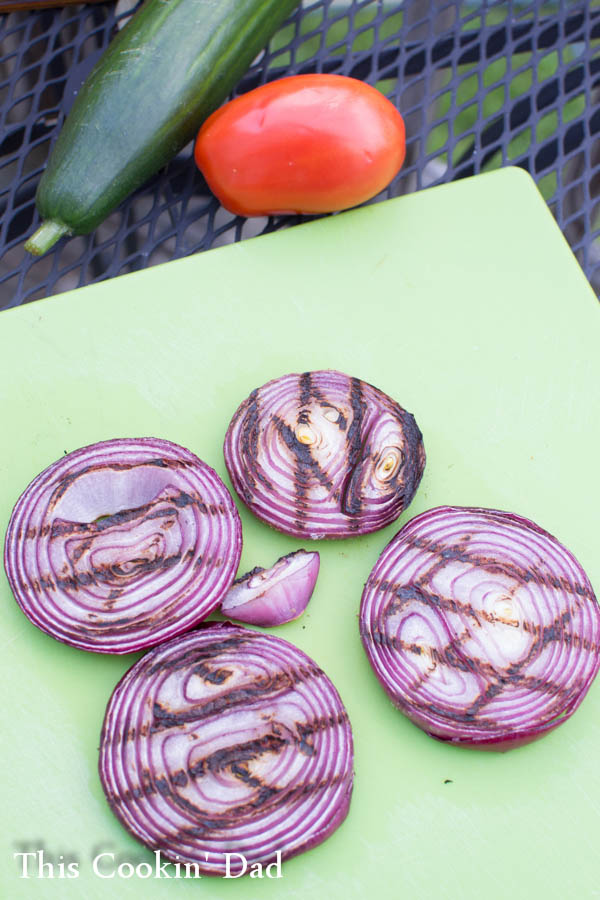
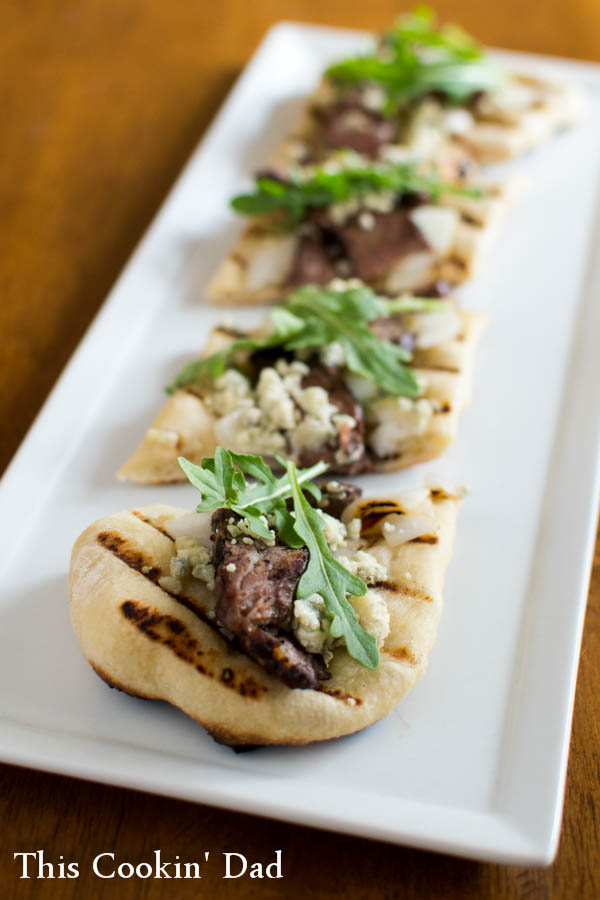
…to leftover steak with grilled onions and blue cheese!

Flatbreads-3
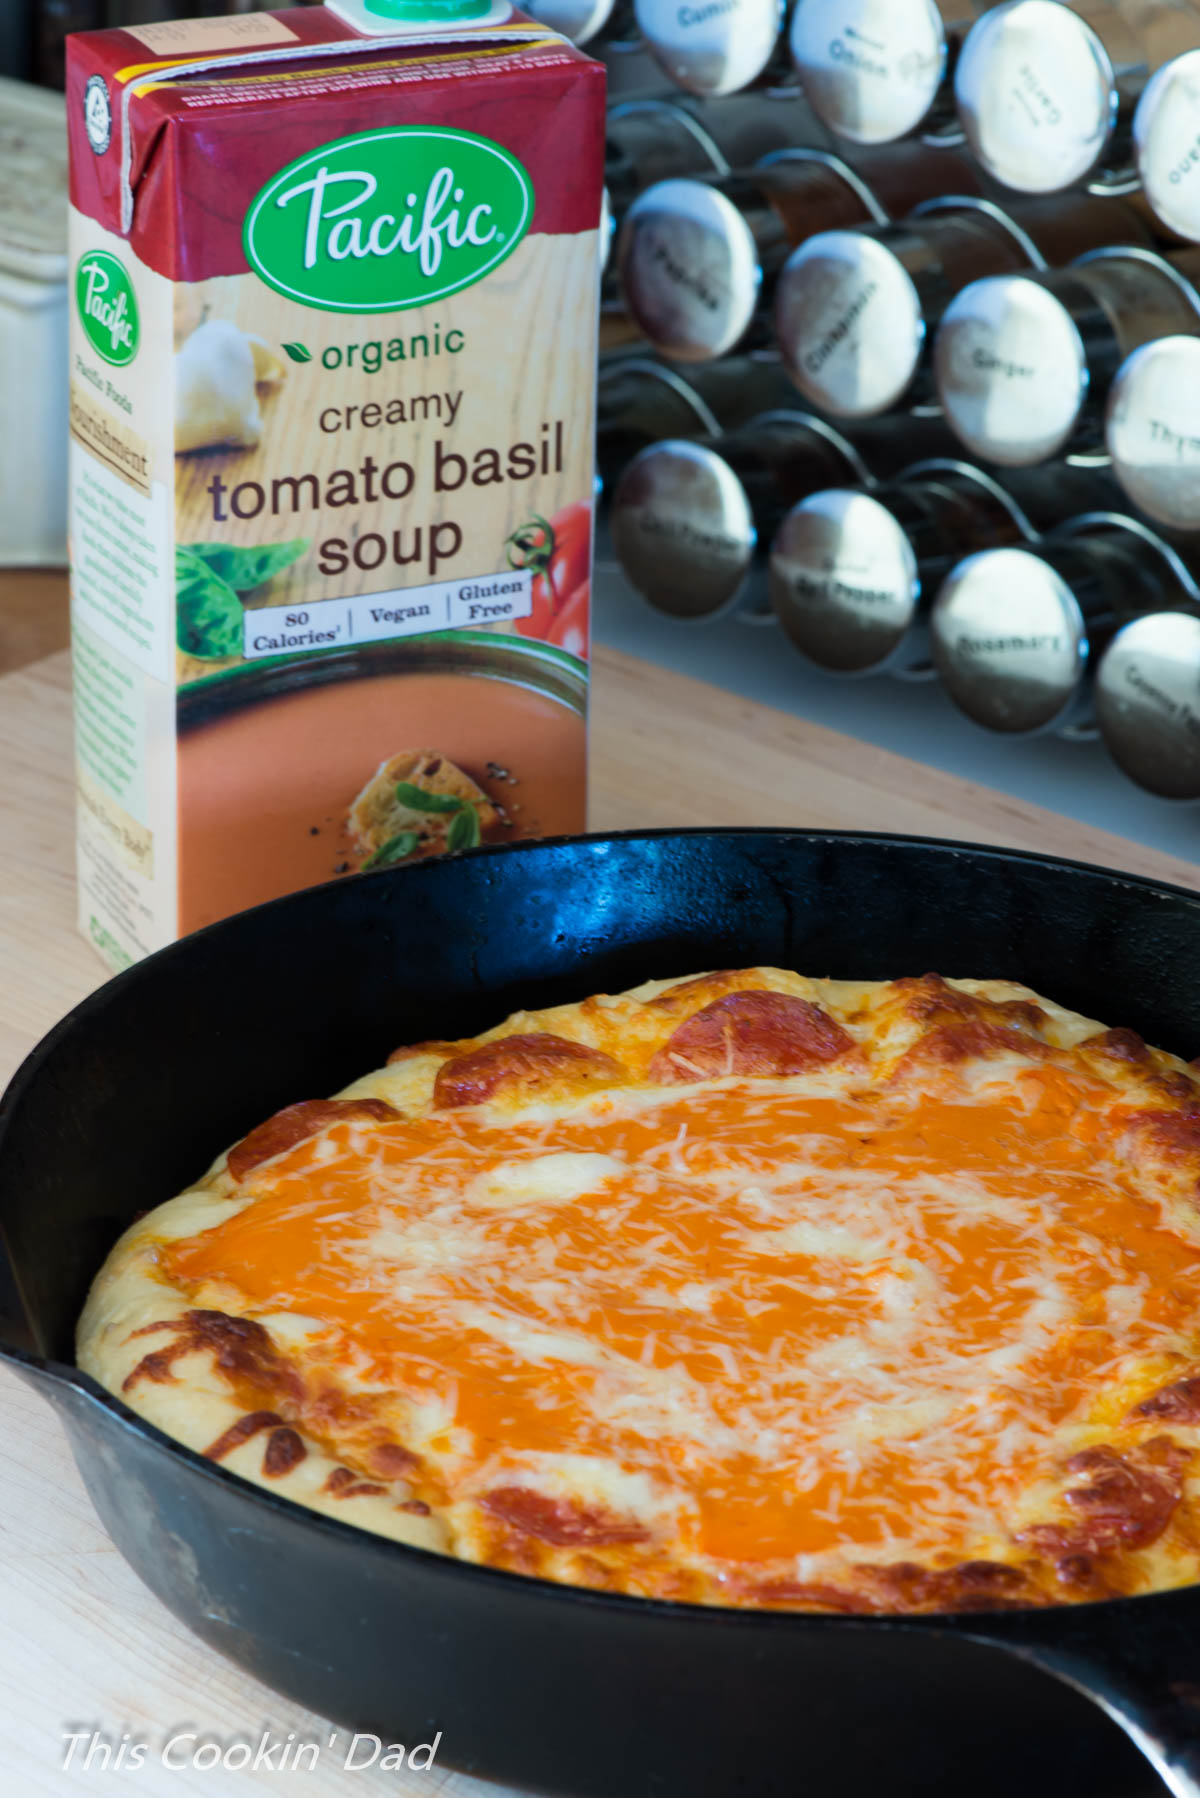
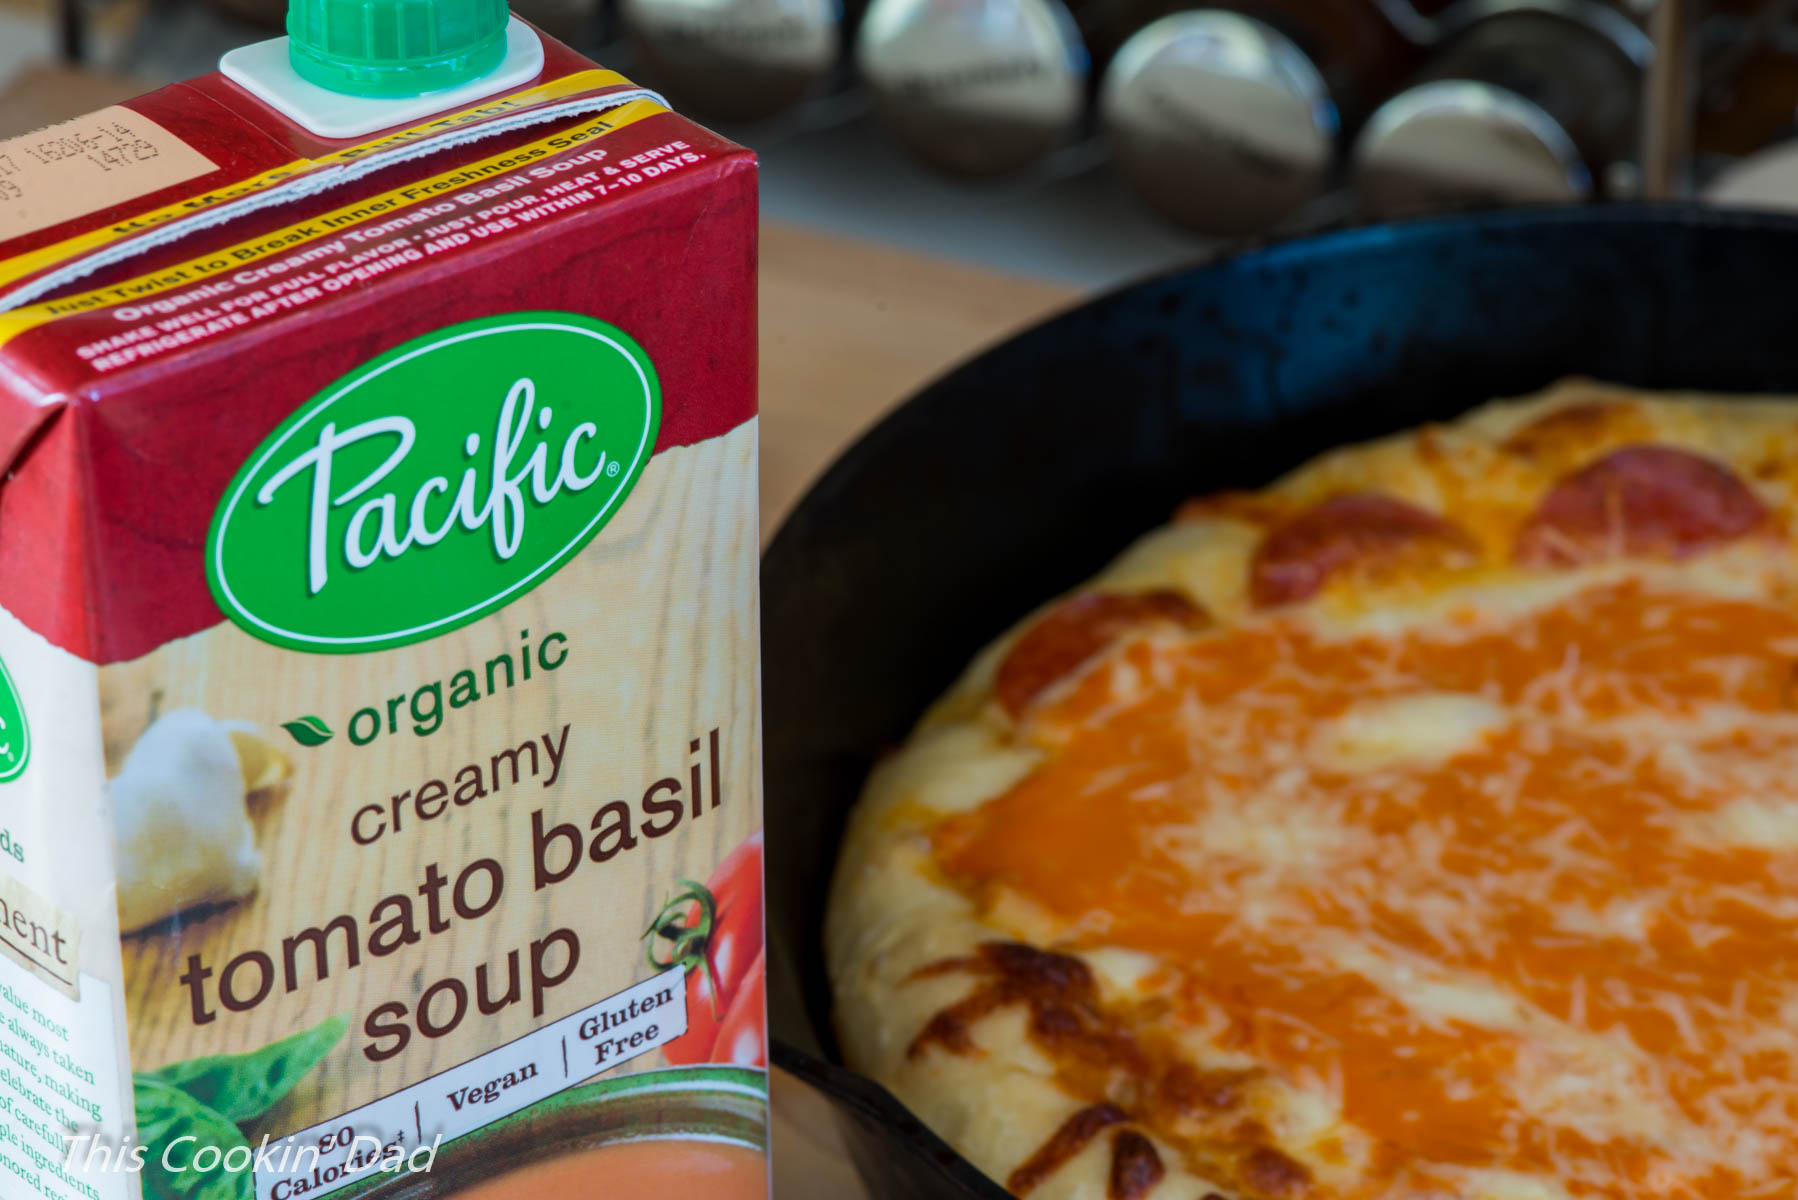
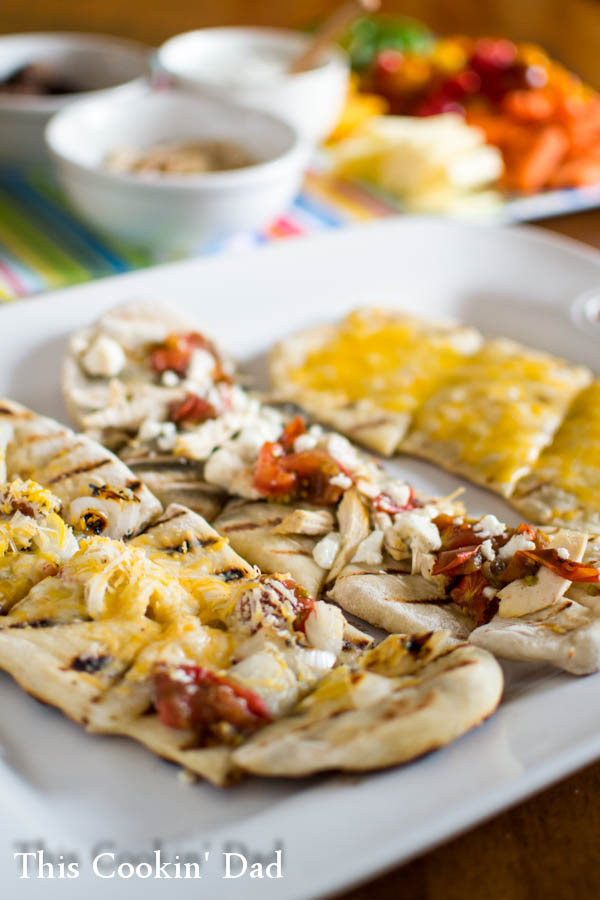
One ball of dough can make 4 flatbreads, so I make sure to have plenty of variety for the family. Everyone gets something that they want to eat.

Flatbreads-4Make sure that any fresh ingredients, like arugula or any fresh herbs, go on after cooking. You want them to retain their freshness and color.

Flatbreads-5Do you cook flatbreads on the grill? What are your favorite toppings? Leave a comment and share your story!

Steakhouse Flatbread
Recipe Type: Entree
Author: Brian
Ingredients
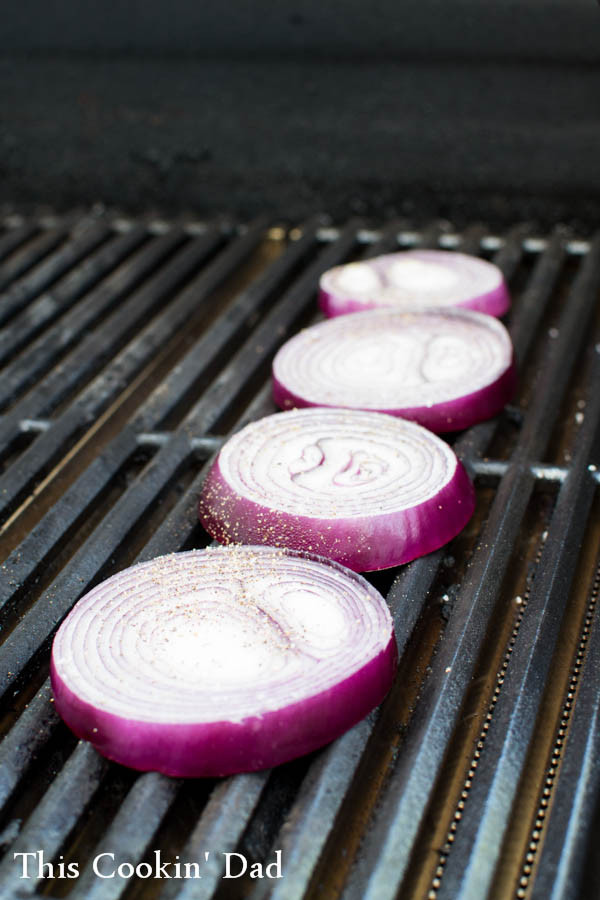
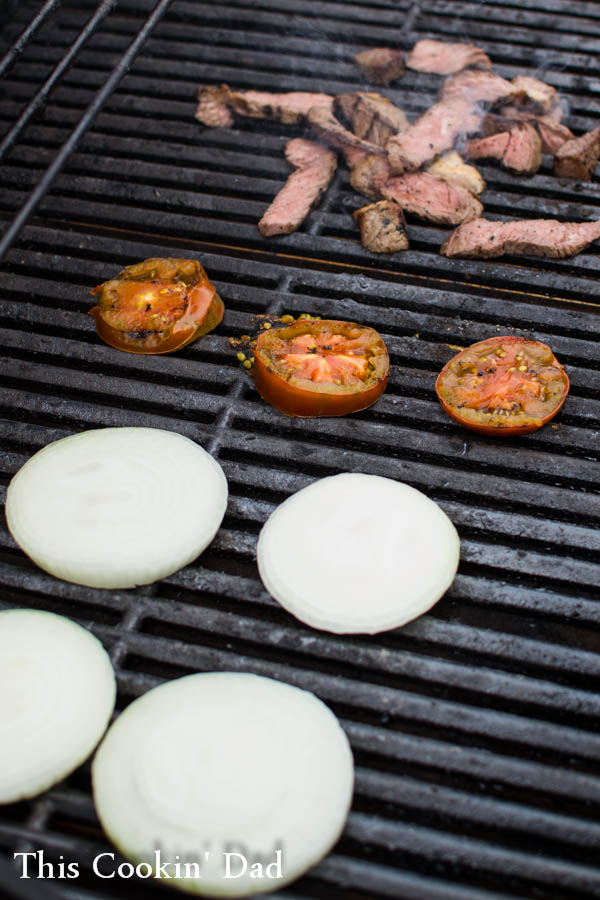
  • 1 sweet onion, sliced about 1/4″ thick
  • 1 ball pizza dough
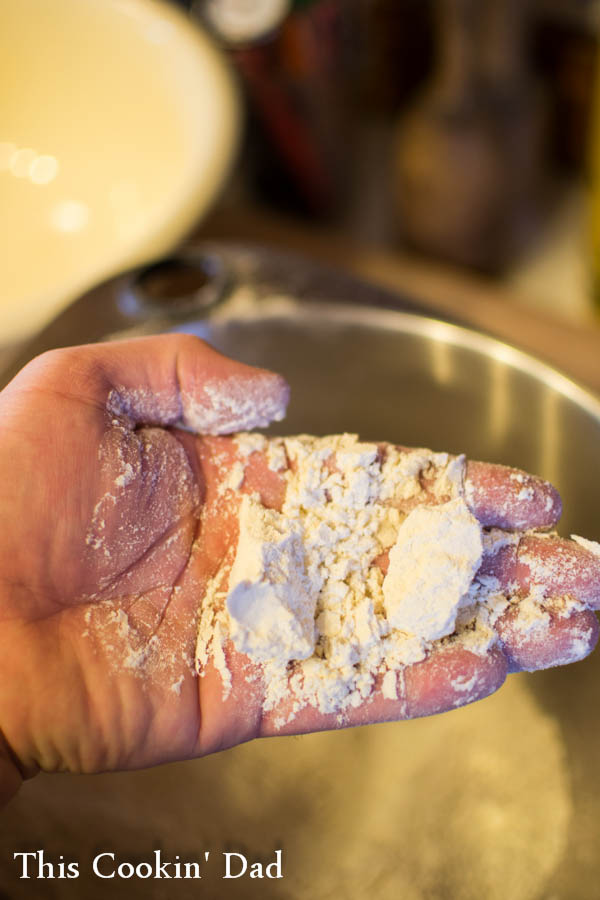
  • flour for rolling dough
  • olive oil to brush dough
  • 2 cups steak, cooked and sliced thin
  • 1/2 cup blue cheese, crumbled
  • 1 cup baby arugula
Instructions
  1. Heat a grill to medium heat.
  2. Place sliced onions onto the grill. Cook until browned, 3-5 minutes per side. Slice and reserve for later use.
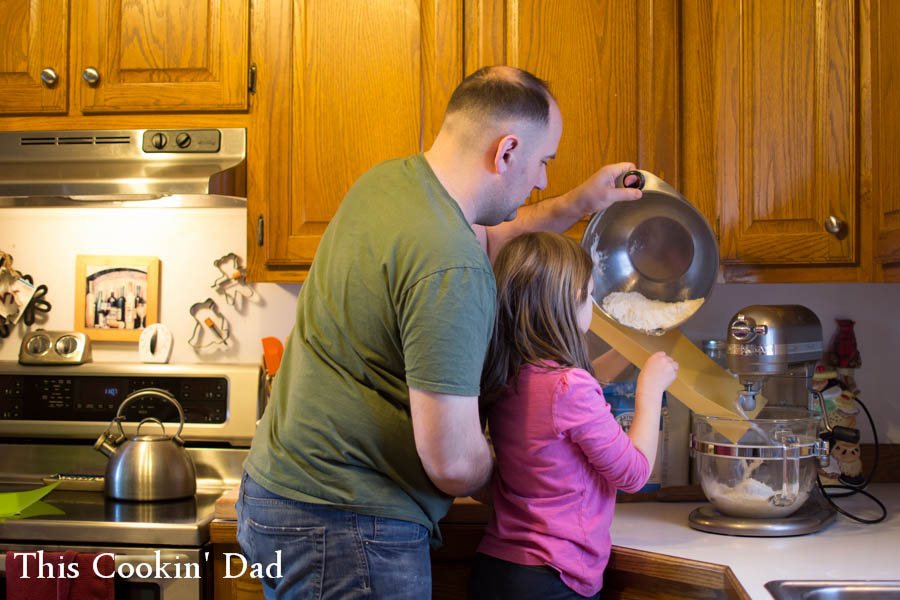
  3. Meanwhile, dust a cutting board and rolling pin with flour. Divide the dough into 4 parts. Roll each part into a long, thin rectangle. Drizzle one side with olive oil. Place onto grill, drizzle other side with more oil. Cook for 2-3 minutes or until lightly charred. Flip to other side.
  4. Quickly top the flatbread with steak, onions, and blue cheese. Close the lid and cook for 3-4 minutes, or until cheese just starts to melt and bottom crust is charred.
  5. Slice each flatbread into 4 servings and top with arugula. Serve and enjoy!
3.3.3070


Filed Under: Cookin' Tagged With: arugula, bread, cookin', cooking, flatbread, food, grill, grilled, grilling, onion, pizza, recipe, steak

Grilled Panzanella (Bread Salad)

June 16, 2015 by thiscookindad Leave a Comment

This entire month, This Cookin’ Dad is devoted to grilling and, last week, I wrote a little about one of my favorite things to grill, bread. I love to make crostini and bruschetta and to just serve some toasted bread alongside a grilled meal. During the summer months, though, with all of the fresh produce available, it’s hard to top Grilled Panzanella, a simple bread salad prepared with both grilled and fresh ingredients.

Grilled-Panzanella-7Panzanella is a Tuscan dish that is based on tomatoes, onions, and stale bread dressed with oil and vinegar. Typically, you’ll see the bread soaked in water and squeezed dry. Sometimes, it’s the juice from the fresh, ripe tomatoes that gives the bread new life. What is clear is that, in the Tuscan tradition of never throwing anything away, this dish was intended to give day old bread a second chance. What a great way to stretch your food dollar a little further!

To me, the traditional panzanella can still be a little soggy. I think that grilling the bread helps you to maintain a nice balance between crunchy and chewy, but still provides a vehicle to soak up all of the dressing and tomato juices.

I start with bread that is a day or even two days old. I cut it into nice, thick slabs, brush with a little olive oil, and place them onto a grill set to medium heat. A few minutes on each side will brown up the bread and lend a great smokiness to your salad.

Grilled-Panzanella-1At the same time, I’ve got my red onions on the grill. Be sure to cut these thicker than you’d think you have to or they will fall apart on the grill. These four slices are an entire red onion.

Grilled-Panzanella-2After about 5 minutes per side on the grill, you get some beautiful char. You maintain the integrity and some of the sharpness of the onions, but also develop some of the candy-like sweetness. It’s kind of addicting!

Grilled-Panzanella-5After everything is removed from the grill, I cube up my bread…

Grilled-Panzanella-3…chop up some tomatoes and cucumbers…

Grilled-Panzanella-4…and start to toss it all together with some olive oil, vinegar, salt, and pepper. Your choice of oil and vinegar are entirely up to you. I used an herbed olive oil for a little more flavor. Red wine vinegar is fine, but I have a peach balsamic vinegar that just screams summer!

Grilled-Panzanella-6Divvy it all up and serve as a side if you must, but this salad is meant to be the main event!

We are grilling up a storm this month. Do you spend all summer on the grill? What are your favorite grilled dishes? Leave a comment and share your story!

Grilled Panzanella (Bread Salad)
Recipe Type: Salad
Cuisine: Italian
Author: Brian
This recipe is really more of a guideline than anything. Use what you have and cook without fear!
Ingredients
  • 1/2 loaf of day old bread, cut into 1″-1 1/2″ thick slices
  • 6 tbsp olive oil, divided
  • 1 red onion, cut into 1/2″ rings, not separated
  • 3 roma tomatoes, diced
  • 1 English cucumber, diced
  • salt and pepper to taste
  • 2 tbsp peach balsamic vinegar
Instructions
  1. Heat a grill to medium-high heat.
  2. Brush one side of bread with 1 tbsp olive oil. Place oil side down onto the heated grill. Brush other side with 1 tbsp oil. Cook until lightly charred, 2-3 minutes per side. Remove and cool for a minute or two before cubing.
  3. Meanwhile, place onions onto the grill. Cook 3-5 minutes per side. Remove from grill and slice into bite-sized pieces.
  4. Combine bread, onion, tomatoes, and cucumbers in a large mixing bowl. Drizzle with vinegar and remaining oil. Add salt and pepper to taste.
  5. Divide into bowls and serve. Enjoy!
3.3.3070


Filed Under: Cookin' Tagged With: bread, bread salad, cookin', cooking, food, grill, grilled, grilling, panzanella, recipe, salad

Cast Iron Cornbread

March 24, 2015 by thiscookindad 9 Comments

In today’s focus on grains, I’m going to take a look at corn and share my method for making crispy cornbread. I am from the southern United States and, for us, cornbread could very well be it’s own food group. I grew up eating cornbread with beans, greens, and everything in between. I’ve had it in squares and in muffin form, often baked in a 9×13 cake pan. By far, though, my favorite way to eat cornbread is in wedge form, slathered with butter, after baking in a hot cast iron skillet coated in bacon grease.

Cornbread-2Corn itself is a major staple crop in the Americas. Originally domesticated in Mexico, corn began spreading amongst the native peoples as early as 2500 BC, and quickly spread through Europe and the rest of the world when European explorers discovered it the 1500’s.

Corn’s uses are very wide ranging. Food uses include the sweet corn that we eat as corn on the cob, popcorn, ground cornmeal that we use for grits and cornbread, masa that is used to make tortillas or tamales, and, of course, bourbon whiskey. Non human-food uses include corn use as animal feed and as biofuel. Did you know that about 40% of the corn grown in the US is for use as ethanol?

So corn can be used for just about anything, right? Why focus on cornbread? Mostly because I really enjoy eating cornbread! I think the most important part of the cornbread, though, is the crispy crust. In my opinion, the best way to ensure that is to use a cast-iron skillet.

It’s easier than you’d think! You put a cast-iron skillet over medium-high heat while you mix up your batter (see recipe below). Add some reserved bacon grease into the skillet (if you don’t save bacon grease, you should start, but just fry up 3 or 4 pieces of bacon for now). Then pour your batter into the pan and toss the pan into the oven.

Cornbread-1After about 30 minutes, you have cornbread. Easy, right? Cut it into wedges, top with a pat of butter, and eat. Oh, you can serve it with other stuff, too. Might I suggest a nice big bowl of chili? YUM!

What are your favorite memories of cornbread? How do you feel about corn and about grains, in general? What are your favorites? Do you shy away from them? We’ll be discussing grains through March on This Cookin’ Dad. Please leave a comment and share your story.

Cast Iron Cornbread
Recipe Type: Bread
Author: Brian
Ingredients
  • 1 cup medium grind cornmeal
  • 3/4 cup all-purpose flour
  • 1 tbsp white sugar
  • 1 1/2 tsp baking powder
  • pinch of salt
  • 6 tbsp unsalted butter, melted
  • 2 large eggs, lightly beaten
  • 1 1/2 cups buttermilk
  • 2-3 tbsp bacon grease (or 4 slices bacon)
Instructions
  1. Set oven to 425. Heat a 9-inch cast-iron skillet over medium-high heat.
  2. In a large mixing bowl, combine first 5 ingredients. In a separate bowl, combine butter, eggs, and buttermilk. Pour wet ingredients over the dry ingredients and mix until all ingredients are moistened (batter will still be lumpy).
  3. Drop bacon grease into heated skillet (or cook bacon). Once grease is melted down, pour batter into the skillet. Place immediately into the oven.
  4. Bake for 25 minutes or until a toothpick inserted into the middle comes out clean. Let cool in the skillet for 10 minutes.
  5. Slice into wedges, top with butter, and enjoy!
3.2.2925


Filed Under: Cookin' Tagged With: bread, cookin', cooking, corn, cornbread, food, grain, grains, recipe

Irish Soda Bread of Abundance

March 17, 2015 by thiscookindad Leave a Comment

In February, I spent an entire month talking about breads. In reality, though, some of the most popular breads are viewed as celebratory breads and are pulled out just a couple of times each year. With it being St. Patrick’s Day, I wanted to take a look at Irish soda bread. I found a recipe, baked up a batch, and wound up learning far more than I thought I would.

Irish-Soda-Bread-1Rather than spending time trying to develop a recipe, I just wanted to focus in on the idea of Irish soda bread as we tend to think of it. So, I found a recipe online (specifically, Ina Garten’s Irish Soda Bread Recipe), prepared it, and took a photo. Of course, I got to eating it as well! However, in preparing for this post and in taking a look at the history of Irish soda bread, I found myself puzzled.

I thought that I was pretty smart knowing that it’s called “soda bread” because it employs baking soda as a leavener instead of yeast. I was interested to find out why. Poverty played a role in this, but, perhaps a larger role was the Irish insistence on using soft wheat in the breads. As it turns out, baking soda is a more effective at making soft wheat rise (hard wheat, which is more typically used in European style breads, rises better with yeast).

What puzzled me, though, was that, in the histories of Irish soda bread, I could find no mention of the raisins, currants, orange zest, etc. that we usually associate with Irish soda bread. Even eggs were considered a treat! In fact, the traditional Irish soda bread was more of an everyday bread, made up solely of flour, baking soda, buttermilk, and salt. I thought that I would at least have read about the other ingredients being added during times of celebration, but really, there was none of that.

The only time I read about other ingredients are when articles referred to an “Americanized” version of Irish soda bread. If you search through recipes, you can find caraway seeds, orange zest, currants, and raisins as pretty “normal” add-ins, but you’ll also see recipes with apples, chocolate chips, and all kind of other stuff. I imagine that some Irish, upon moving to America, were overjoyed at the abundance in their new country and added little bits here and there to their familiar breads. I can even imagine that the hard wheat here just needed a little extra help to make the bread “right.”

As a father looking to pass down his heritage, though, I can also see where the kids might have had some influence. How many kids in school had light crusty breads smeared with sweet jams? How about sweet breakfast breads? The Irish kids were just stuck, right? I think that some loving Irish mother threw in a handful of dried berries one day just to get her kids to eat and appreciate what they had. The rest just took off from there. Who wouldn’t do that for their kids, right?

I know that we do that in our house all the time. Changing my family’s seafood gumbo recipe to accommodate a seafood allergy or even adding chocolate chips to a treasured banana bread recipe. In the end, what matters more? The tradition itself or keeping that tradition alive?

Would you change a family recipe to suit new tastes? What would you change? How would you change it? Leave a comment and share your story.


Filed Under: Cookin', Lookin' Tagged With: bread, breads, cookin', cooking, food, irish soda bread, recipe, recipes, soda bread

Banana Bread

February 26, 2015 by thiscookindad 12 Comments

When I’m cooking, I don’t use recipes too much. I might consult them to figure out times, heat levels, or ingredients that go well together, but, generally, I free form. When baking, on the other hand, you pretty much need a recipe. I develop a number of them over time, but the best recipes, I’ve found, are the ones that are inherited. My wife’s grandmother passed down her recipe for Banana Bread years ago and, though I’ve tweaked add-ins or toppings over the years, the base recipe has stayed exactly the same.

Banana-Bread-5Banana bread is a pretty recent addition to the culinary scene, having come about during the Great Depression as a way to use up bananas that were going bad. Banana bread is a quick bread, meaning that it rises without yeast, using chemical leaveners like baking powder to get it’s lift. Like many quick breads, it’s impossibly easy to make. You mix up your wet ingredients, add your dry, stir them together, and bake. Easy peasy!

What I love most about this recipe is that it’s easy for the kids to get involved. Grace could easily mash up the bananas…

Banana-Bread-1…and crack open the eggs.

Banana-Bread-2Beth helped her with the rest of the ingredients and helped pour into mini-loaf pans.

Banana-Bread-3What I love most about this recipe is that it is so customizable. We are adding pecans in one, chocolate chips in another, both in a third, and leaving the fourth plain. You could absolutely add anything you want. We’ve done coconut and I really want to try one with white chocolate and dried cranberries. YUM!

Banana-Bread-4After a turn in the oven, the banana bread puffs up, golden and beautiful. Remove it from the pan right away and let it cool before digging in! Enjoy!

Banana-Bread-5What would you put into your banana bread? Are you all about the bread? Throughout February, I’ll be focusing on how to make breads in all different forms. What is your favorite? Leave a comment and share your story.

Banana Bread
Recipe Type: Breads
Author: Brian
Ingredients
  • 1 cup ripe mashed bananas, about 2 bananas
  • 1 cup sugar
  • 3 Tbsp canola oil
  • 3/4 cup milk
  • 1 egg
  • 2 1/2 cups flour
  • 1 tsp salt
  • 3 1/2 tsp baking powder
  • 1 cup chopped nuts (optional)
  • 1 cup chocolate chips (optional)
Instructions
  1. Preheat oven to 350 degrees. Grease and flour loaf pan or mini loaf pans.
  2. Combine first 5 ingredients (through egg) in a large mixing bowl or in the work bowl of a stand mixer.
  3. In a separate mixing bowl, combine flour, salt, and baking powder. Add in three stages to the banana mixture, scraping the bowl between each addition. Mix just until all of the flour mixture in incorporated.
  4. Pour batter into a large loaf pan or four mini loaf pans.
  5. Bake at 350 for about 1 hour for large loaf or 45 minutes for mini loaves or until golden brown and toothpick inserted in the center comes out clean.
  6. Remove from pans immediately and cool.
  7. Enjoy!
3.2.2925


Filed Under: Cookin' Tagged With: baking, banana, banana bread, bread, breads, cookin', cooking, food, recipe

Indian Fry Bread

February 17, 2015 by thiscookindad 2 Comments

I have two major goals with food. One, keep it simple. The last thing I need is to add more stress in my life by making meal time insanely difficult. Two, show my kids where food really comes from. They need to be able to feed themselves by taking basic ingredients and turning them into great food. This Indian Fry Bread really combines the two by taking 6 simple ingredients and turning them into a hearty base for an easy meal.

Indian-Fry-Bread-5We start with flour, baking soda, and a little salt.

Indian-Fry-Bread-1After adding milk and water, we stir the dough around until it forms a ball. The dough will be slightly tacky.

Indian-Fry-Bread-2We grab small balls of dough (about the size of a lime, maybe) and roll them out onto a lightly floured surface.

Indian-Fry-Bread-3After a trip into some hot oil, we remove them, sprinkle on a little extra salt, and let them drain on some paper towels. They should be golden brown, slightly crispy on the outside, and soft on the inside. My daughter loved taking the rolled dough, carefully sliding it into the oil, and using the tongs to turn and remove the bread. She got a little help on the first one, but, by the second, I think she had it mastered! It’s nice to have a little help in the kitchen sometimes.

Indian-Fry-Bread-4After they’ve drained, our fry bread is ready to be topped with just about anything or even eaten on it’s own. We chose your average, run of the mill, taco toppings to make an anything but average fry bread taco. YUM!

Indian-Fry-Bread-5What are your favorite toppings? Are you all about the bread? Throughout February, I’ll be focusing on how to make breads in all different forms. What is your favorite? Leave a comment and share your story.

Indian Fry Bread
Recipe Type: Dinner
Cuisine: Native American
Author: Brian
Ingredients
  • 3 cups all-purpose flour
  • 1/2 tsp kosher salt, plus more for seasoning cooked bread
  • 1 tbsp baking powder
  • 3/4 cup milk
  • 3/4 cup warm water
  • oil for frying
Instructions
  1. Combine flour, salt, and baking powder in a large mixing bowl.
  2. Add milk and water. Stir with wooden spoon or by hand until a slightly tacky dough forms. Let rest for 30 minutes.
  3. Fill a high-rimmed skillet half-full of vegetable oil. Heat oil to about 350.
  4. Pull off lime-sized pieces of dough from the larger dough ball and roll flat on a lightly floured surface.
  5. Slide the dough into the oil and fry four about 2 minutes. Turn and fry on the other side for another minute. Remove to paper towels to drain and season with additional salt. Repeat with remaining dough.
  6. Top with your favorite toppings and enjoy!
3.2.2925


Filed Under: Cookin' Tagged With: bread, breads, cookin', cooking, food, fry bread, indian, indian fry bread, recipe, taco

Muffuletta Bread

February 4, 2015 by thiscookindad 1 Comment

The muffuletta, or muffaletta, is one of the most iconic sandwiches in New Orleans. Developed by Central Grocery in 1906, the muffuletta combines Italian meats and cheeses and an Olive Salad onto a round, dense loaf studded with sesame seeds. It’s pretty much simplicity in action, but simplicity, sometimes, can be difficult to recreate.

Muffuletta-Bread-8Living in Central Virginia now, it is not easy to find this style of sandwich. Sure, some people attempt to recreate it during the Mardi Gras season, but they use a poor excuse for olive salad and they try to stuff it into a French style roll as each order comes in. The key to a great muffuletta is found in the dense crumb of the bread and in letting the completed, wrapped sandwich sit in the fridge for an hour or two so that the bread can soak up the juices from that olive salad.

Since this is bread month, we are going to tackle the problem of the bread. First, and most importantly, I grab my assistant and we wash our hands.

Muffuletta-Bread-1We add warm water to some yeast and sugar and wait for it to bloom (it gets all “puffy”).

Muffuletta-Bread-2While we are waiting, we prepare our dry ingredients, making sure that the mixture is good and crumbly.

Muffuletta-Bread-3Then we add it to the yeast mixture and let the mixer do the work for us.

Muffuletta-Bread-4We pull the dough from the mixer, shape it into a ball, oil up our family bread bowl, and turn our dough into it.

Muffuletta-Bread-5After a few hours, the bread has doubled in size.

Muffuletta-Bread-6We punch it down, flatten it out and place it on an oiled sheet pan to rise for another hour.

Muffuletta-Bread-7After an egg wash, a trip to the oven, and a cool down, our bread is ready to slice for some yummy sandwiches!

Muffuletta-Bread-8Stay tuned for more on the muffuletta sandwich!

Are you all about the bread? Throughout February, I’ll be focusing on how to make breads in all different forms. What is your favorite?

Muffuletta Bread
Recipe Type: Bread
Author: Brian
Ingredients
  • 1 C warm water (105-110 degrees F)
  • 1 Tbsp dry active yeast
  • 1 Tbsp white sugar
  • 1 C bread flour
  • 2 C all-purpose flour
  • 1 1/2 tsp kosher salt
  • 2 Tbsp vegetable shortening
  • 2 Tbsp sesame seeds
  • 3 Tbsp olive oil, divided
Instructions
  1. In a stand mixer, combine the water, yeast, and sugar. Stir and allow to sit for about 10 minutes.
  2. Meanwhile, in a separate bowl, combine the flours, salt, and shortening, working with your hands until the shortening is fully incorporated and the mixture is crumbly.
  3. Once the yeast is foamy, attach a dough hook to your stand mixer and add two cups of the flour mixture. Mix on low speed until most of the flour is moist before adding the rest of the flour mixture.
  4. Allow the mixer to run on low speed until the dough is smooth and elastic, about 10 minutes, stopping periodically to feel the dough.
  5. Once the dough is ready, pour 2 Tbsp of olive oil into a large bowl, fully coating the insides. Form the dough into a ball and place into the bowl, turning to coat. Cover the bowl with a towel and set in a warm part of the kitchen for about 1.5 hours, or until doubled in size.
  6. Punch down the dough and flatten into a large disk (about 9-10 inches across), and place onto a baking sheet oiled with the remaining 1 Tbsp oil. Sprinkle with sesame seeds and cover with a towel. Let rest for another hour.
  7. Once dough is ready, combine egg and water in a small dish and brush over the top of the dough. Place into a pre-heated 425 degree F oven and bake for 25-30 minutes or until golden brown.
  8. Remove from oven to a cooling rack. Let cool completely before slicing.
  9. Enjoy!!
3.2.2925


Filed Under: Cookin' Tagged With: baking, bread, breads, cookin', cooking, food, kids, kids in the kitchen, muffuletta, recipe

Why I Make Bread

February 3, 2015 by thiscookindad Leave a Comment

Throughout January, I focused on how to make yummy, comforting soups and stews. Nothing goes better with soups and stews than a yummy, crusty bit of bread to sop up all of the leftover broth or gravy. So for February, I’m focusing on how to make bread.

BreadBread is one of the oldest prepared foods. For millennia, cultures have ground starches into flours, mixed them with water and other ingredients, and cooked them to create different types of bread. From pita to pizza, leavened or unleavened, baguettes to the sliced white bread that we all grew up with, bread is something that we can all relate to and I adore all of the effort that goes into creating that -beautiful, crusty loaf of sourdough bread that you can get at your corner bakery.

My mission here, then, is to take a couple of steps backwards. Most of us have access to that that lovely loaf anytime, but let’s take a few extra minutes every week or so to see if we can’t do a little better. Let’s remember our grandparents, our  history, and show our kids that taking that little bit of extra time is worth it. Let’s show them that food isn’t supposed to come ready-to-eat in plastic baggies, but that someone has to make it.

Mind you, I am not a professional baker, so I’m not getting into a load of fancy breads that you could never make at home. I’m talking about breads that are fairly simple to make and that range a variety of cuisines and meal types. We’re looking at corn tortillas, pizza dough, quick breads, even a few surprises for Mardi Gras. I’ll even be getting the kids involved so that they know where bread comes from and what it’s supposed to look and feel like when you make it from scratch.

I hope that you enjoy the effort and make it a point to try a few of these at your own home!

Throughout February, I’m focused on making breads, both sweet and savory. Did you grow up making bread at home? What is your favorite type of bread? Leave a comment and share your story!

Filed Under: Cookin', Livin' Tagged With: bread, cookin', cooking, kids

Pan Pizza with Creamy Tomato Basil Soup

October 14, 2016 by thiscookindad Leave a Comment

Thanks to Pacific Foods for making this post possible.

We are an active family and, far too often, a hearty, soul-satisfying dinner just goes by the wayside. If we aren’t actively engaged in something, we are exhausted from being actively engaged in something! Still, our kids need to eat and I’m happy to have found that the Organic Creamy Tomato Basil Soup from Pacific Foods gives me great options to feed my picky kids. Not only is it easy and convenient to serve the tomato soup as is, but I can make an amazing (and super easy) pan pizza by using that same soup instead of tomato sauce!

creamy-tomato-basil-pan-pizza-7

We’ve got three young kids who are involved in scouting, sports, band, and many other activities. My wife and I both work (often with me working evenings) and we both volunteer in our community, for our church, and for professional organizations. I’m a football coach and Beth is a Girl Scout troop leader. The action around here just doesn’t stop! With the weather turning colder, I can always count on a bowl of tomato soup for an easy dinner. Unfortunately, my oldest and my youngest just don’t like tomato soup. They do, however, LOVE pizza!

creamy-tomato-basil-pan-pizza-8

Since I don’t like having too many open containers in my fridge. I thought I’d try using some of the soup that I was heating up for dinner as the sauce in a pizza. It worked just beautifully! Here’s what I do…

I pull a ball of pizza dough out of the fridge (here’s my recipe) and spread it out into a cast-iron pan that I’ve prepped with plenty of olive oil. You could use a pie plate or cake pan, but I really love using the cast-iron for recipes like this. It just gives that crust a little something extra!

creamy-tomato-basil-pan-pizza-1

I let that sit for about 30 minutes so that the dough can rise a little more. Then I spread it out further, even up the sides of the pan a little, being careful not to tear it. Start this as soon as you get home from work and use that extra 30 minutes to get changed, check homework, get toppings ready, etc. Just get your head straight from a long day!

Now I add my toppings. With a pan pizza, it often works better to layer your toppings first and then add sauce over the top. So I press the cheese into the bottom, pushing into the corners to make sure that I have a great crust. Then I top with pepperoni and more cheese!

creamy-tomato-basil-pan-pizza-2

So, this is the part where people wonder how my mind operates. I pour about 1/2 cup of Organic Creamy Tomato Basil Soup from Pacific Foods right over top of the cheese and pepperoni. It seems a little crazy to pour soup over your pizza, but the tangy sweetness of organic tomatoes coupled with the bright, savory notes of basil makes it an amazing replacement for pizza sauce. Plus, it’s vegan and gluten-free, so I feel like I can definitely trust my kids with it! Just don’t pour too much or you’ll wind up with something more like a pizza bread bowl. Not bad, but not a pizza!

creamy-tomato-basil-pan-pizza-3

Sprinkle on a handful of Parmesan cheese and bake at 450 for 15-20 minutes, let rest for another 5 and your family is in for a treat!

creamy-tomato-basil-pan-pizza-5

Just look at that stretchy cheese!

creamy-tomato-basil-pan-pizza-4

Serve alongside that same tomato soup and you can even use that beautiful crust to sop it up!

creamy-tomato-basil-pan-pizza-6

For an even easier weeknight meal, try this! Split English muffins across the middle, top each with about 2 teaspoons of tomato soup and a little cheese. Bake at 350 for about 5 minutes or until the cheese is good and melty. Serve with soup and enjoy!

creamy-tomato-basil-pan-pizza-9

Are you a busy parent or anyone else just looking for convenient, ready-made soups? Pacific’s wide variety of organic soups are inspired by traditional recipes and Pacific Foods is dedicated to sourcing simple ingredients cultivated through sustainable practices. It’s food that you can just feel good about! Make sure that you head over to Pacific’s Instagram page for a chance to win a 12-pack of Pacific’s delicious new fall soups, including Organic Creamy Tomato Basil Soup, Roasted Garlic & Potato, Organic Vegetable Masala Stew, and Hearty Coconut Curry Soup.

Do you do something with tomato soup besides just eating as is? What’s your favorite way to transform it into something more? Leave a comment and share your story!

Filed Under: Cookin'

Going Green with Vegetable Soup

October 1, 2016 by thiscookindad 8 Comments

Thanks to Dreamfields for making this post possible. #HealthyPastaMonth

October is National Pasta Month and Dreamfields is celebrating with 31 different pasta recipes, one for each day of the month, along with prizes and other surprises! This week’s theme is Go Green and, with that in mind, I wanted not only to create a dish that is chock full of veggie goodness, but one that takes advantage of all of those bits of veggies that we hate to throw away, but can never decide how to use. So I’ve created a simple Vegetable Soup featuring Dreamfields Elbows and a yummy pesto made from carrot tops and roasted pumpkin seeds.

vegetable-elbow-soup-with-carrot-top-pesto-1I cook a lot! What that often means is that I have a lot of waste. Onion skins, celery stumps, carrot tops, all trash in most people’s eyes, still pack a ton of flavor. I have taken to saving these parts (that I would ordinarily throw out) in a gallon-sized zip top bag and keeping it in the freezer. Let’s be honest, my freezer is more ingredients at this point than food. Corn cobs, ham bones, bread crumbs…I’ll keep just about anything!

vegetable-elbow-soup-with-carrot-top-pesto-5Once I have a full bag of veggie parts, I can make an amazing veggie broth that will blow away anything you can buy in the supermarket. I just empty the bag into a pot, cover with water, and season with salt and pepper. I bring it to a boil and simmer for a solid hour or two.

vegetable-elbow-soup-with-carrot-top-pesto-6To strain out all of the veggies, I line a colander with paper towels and pour right over. After all of that cooking, you can finally toss those saved veggies.

vegetable-elbow-soup-with-carrot-top-pesto-7Just take a look at that amazing color!! I let it cool down in the fridge and use it over the next couple of days or freeze it for later.

vegetable-elbow-soup-with-carrot-top-pesto-2While I’m at it, I love making up a simple pesto with whatever I have on hand. Traditionally, you might use basil and pine nuts, but I’ve found that carrot tops give an amazing flavor and save you from throwing those out! And since it’s October, why not toss in some roasted pumpkin seeds to reinforce that autumn feel. In the end, it’s all about using what you have on hand! This will keep for a few days in the fridge.

vegetable-elbow-soup-with-carrot-top-pesto-4Now that I have my broth made and I’ve whipped up an easy pesto, I can use them for just about anything, but for an easy weeknight meal, I simply slice up some veggies and cook a box of Dreamfields Elbows. I like Dreamfields because it’s an easy way to make my family’s meals a little bit healthier. It has all of the taste and texture of traditional pasta with 20% of my daily fiber and 7 grams of plant protein per serving!

vegetable-elbow-soup-with-carrot-top-pesto-3Once my pasta is cooked just right and I get my fresh veggies together, it’s almost like setting up a soup bar. I add a serving of Dreamfields Elbows to my bowl, pour in some broth, and add whatever toppings I want. This is a perfect way to make sure that your picky kids get to eat what they want! Personally, I love shredded carrots, radishes, and cilantro. I even add a slice of jalapeno for that nice little touch of heat and then top with that yummy Carrot Top and Pumpkin Seed Pesto.

vegetable-elbow-soup-with-carrot-top-pesto-1Now that you have the idea, it’s up to you how to finish it! How are you going to make this soup your own?

To find the recipes for the Vegetable Elbow Soup with Carrot Top and Pumpkin Seed Pesto, visit Dreamfields and make sure that you sign up for great coupons. Head back every day for new surprises and amazing new recipes!

Finally, for one of my readers, this may be your lucky day. Head over to the Dreamfields site and then leave a comment below that tells me yesterday’s featured recipe and you will be entered to win a case of Dreamfields pasta! This is in addition to the prizes available at the #HealthyPastaMonth page! Come back and enter every day for more chances to win. The contest on my site will end on Sunday, October 9, 2016 at 11:59 pm. Good luck!!

Filed Under: Cookin' Tagged With: dreamfields, dreamfields pasta, freezer, green, pasta, soup, stone soup, vegetable soup

Next Page »
Who's Behind This Cookin' Dad?
I am a husband, father to three, Veteran, and teacher. My camera has helped me find my voice in the kitchen and online. I love to travel and share not only what I see but what I eat while on the road!

Welcome to This Cookin' Dad!

Find it here!

Get emails!

Subscribe by Email

Enter your email address:

Delivered by FeedBurner

Like This Cookin’ Dad on Facebook!

Copyright © 2025 · Tasteful theme by Restored 316

Copyright © 2025 · Tasteful Theme on Genesis Framework · WordPress · Log in